|
|
![]()
![]()
![]()
![]()
![]()
![]()
|
|
|
|
Before joining a belt, confirm that it is of the correct length, skived square (or at the appropriate bias angle), and that it has the right skive length. Make sure that the skive area is absolutely clean; 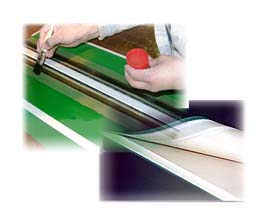 otherwise, use denatured alcohol or an equivalent degreasing agent to clean the skive.
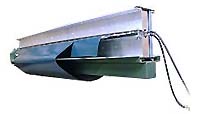
 Finally, make sure your heating press is set at the proper temperature. If the belt width is less than 60% of the press plate, use some scrap pieces of the same belt style and fill up the press plate to approx. 80%. This will assist the splice to have equal pressure across its width. |
* Refer to the U.S. customary units or metric splicing table to find out which belt uses what splicing method.
|
Method* |
|
Steps |
|
I |
Kleber F |
1. Coat only the nylon sections (including the fabrics) of both- ends lightly and evenly with VIS Kleber F, and rub in the solution within the solid nylon area only until you feel the nylon softening or the solution becoming tacky. Do not rub hard on the nylon fabric part as you will erode that area! 2. Immediately join the belt ends and insert them into the heating press. |
|
II |
Kleber F Kleber PL |
1. Coat only the nylon sections (including the fabrics) of both_ends lightly and evenly with VIS Kleber F, and rub in the solution within the solid nylon area until you feel the nylon softening or the solution becoming tacky. Do not rub hard on the nylon fabric part as you will erode that area! Note: If you are not quite certain about where the rubber part ends in the skive, and the nylon fabric starts, apply Kleber PL in the uncertain transition area rather than Kleber F. 2. Coat only the rubber sections of both ends with VIS Kleber PL. 3. Immediately join the belt ends and insert them into the heating press.i |
|
III |
Kleber F 1C |
1. Coat only the leather sections of both_ends with VIS- 1C primer and dry for 15-minutes. 2. Repeat step 1 with a generous layer of VIS- 1C primer and let dry for 60 min! Do not proceed until the primed areas are completely dry! 3. Coat only the nylon section both ends - exclusive the primed leather sections - lightly and evenly with VIS Kleber F and rub in the solution within this solid nylon area until you feel the nylon softening or the solution becoming tacky. Let sit for 3 minutes. 4. Repeat step 4 on one end without the 3 minute waiting time, and finish up by coating the entire skive (nylon and primed leather sections) of the other end lightly and evenly with VIS Kleber F. Do not rub prolonged on the primed leather part as you will erode that area! 5. Immediately join the belt ends and insert them into the heating press. |
|
IV |
Kleber PL |
1. Coat the skive sections of both_ends with VIS Kleber PL and let dry 5-6 min. 2. Join the belt ends and insert them into the heating press. |
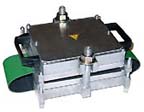
After cooking the belt for the specified time, unplug or turn off the press and let it cool down to at least 145oiF (approx. 60oiC) while keeping the belt in the press and under pressure. You may use a fan to accelerate the cool down process which is important to allow the splice area to solidify and cure out completely. After opening the press, clean up the belt edges and wait for the splice area to cool down to ambient temperature before putting tension on the belt.
Go to the Top of this Page
|